
I wanted to add a button on a Lightning Record Page, and pass the record ID to that flow so I could perform various conditional actions within the Flow, based on field values on the record.
The solution is straight forward, but finding out exactly how to do it took longer than I expected it to. The process is documented in Salesforce help docs (kinda), but when I tried to find specific examples with my Google Fu, I found a ton of misinformation out there. Well, not so much misinformation as it was “stale” information. It wasn’t always possible to pass a record ID to a flow from an Action Button in Lightning, so clever Salesforce Admins and Developers found hacks, like embedding the flow in a Visualforce Page, and calling the VisualForce page from an Action Button.
Now that Flows can be implemented directly on from an Action Button in Salesforce, the process for passing the record ID is straight forward: create a variable (data type: text) in your flow named “recordId”.
If the Flow is being evoked from a Record Page, Salesforce will give the flow context by automatically passing the ID value of the current record to the flow.
Here’s a step-by-step walkthrough. We’re going to make a very simply Flow, which simply displays the current record ID in a pop-up window.
- Navigate to Setup > Flows. Click the “New Flow” button.

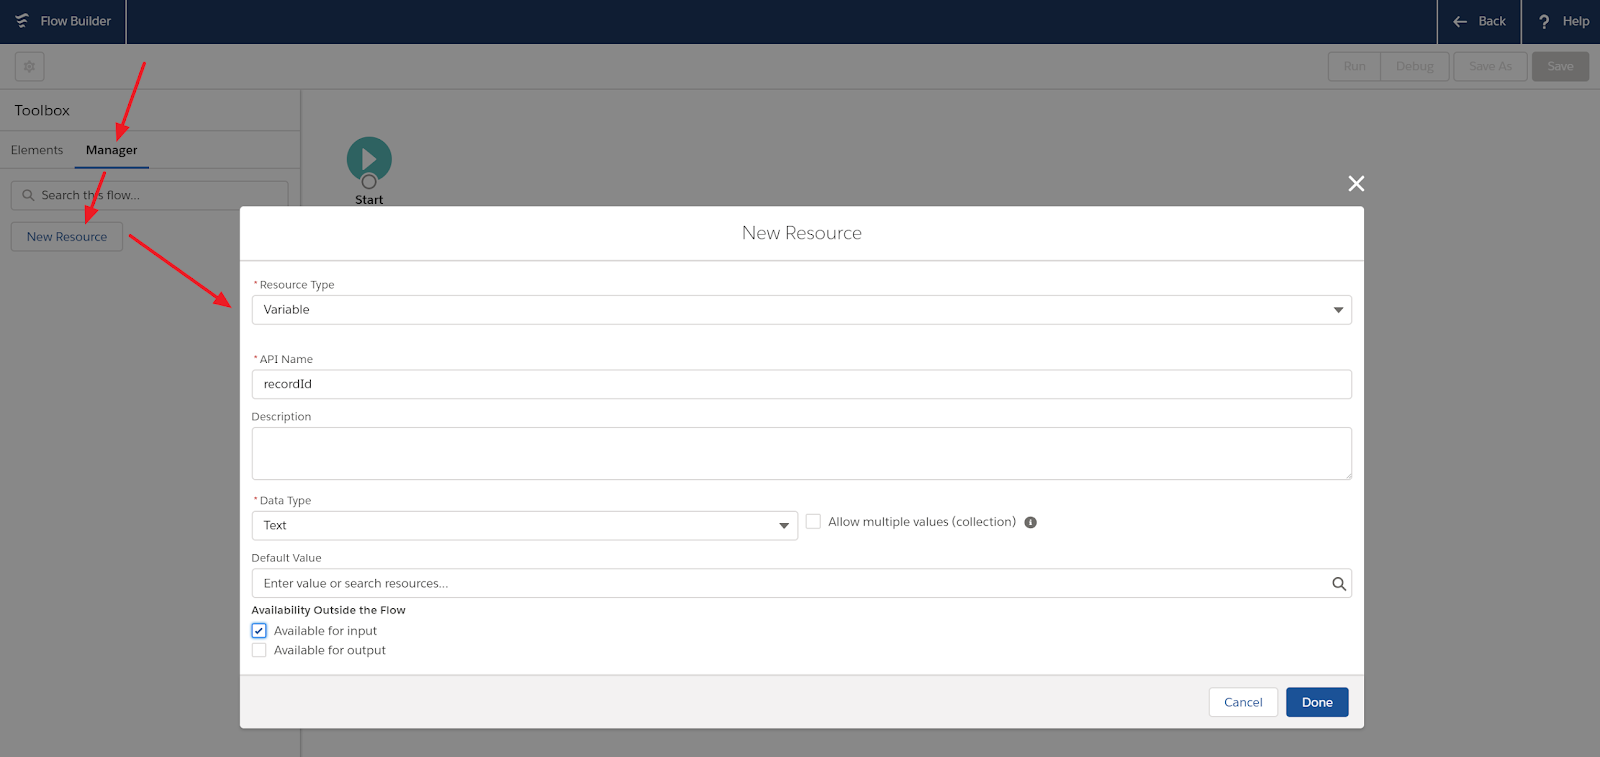
- In the left pane Toolbox, click “Manager” and then the “New Resource” button. Salesforce will prompt you to enter the Resource Type. Select “Variable” from the drop down menu.
- In the New Resource variables declaration box, enter the following values:
- API Name: recordId
- Data Type: Text
- Select “Available for input”
- Click “Done”

- In the Toolbox Elements Tab, click “Screen” and drag it onto your canvas.
- In the Screen Properties section (right pane), give the flow component a Label and API Name (in my example, I use “Show Record ID”).
- In the Screen Components section (left pane), drag the “Display Text” component into the Screen element. Give it an API name. In the text block section, type: “The record ID is: {!recordId}”. Here, {!recordId} references the variable that was passed in at 3.1 above.
- Click Done

- Connect the Start element to the Screen element. Click Save. Salesforce will prompt you to enter:
- Flow Label: type “testShowRecordId”. Salesforce auto-populates the API Name with the same value.
- Type: Screen Flow
- The Flow is created in a deactivated state. To Activate it, from Setup > Flows screen, click the “testShowRecordId” label, then click “Activate”.
- We’ve got our flow! Now we need to add it as an Action Button on an object. You can do this for any object, but in this example, I’ll use the Opportunity record:
- Click Setup > Object Manager.
- Do a Quick Find on “oppo” and select “Opportunity”
- Select “Buttons, Links and Actions”, and then click the “New Action” button
- On the New Action screen, enter the following, and then click save

- Almost done! Now that we have an Action Button created, let’s add it to a page layout. Click “Page Layouts”, select “Opportunity Layout”.
- Select “Mobile & Lightning Actions” from the top banner. The “Show ID” button we just created should be visible.
- Drag “Show ID” down into the “Salesforce Mobile and Lightning Experience Actions” section of the page.
- Save the page layout, and then open an existing Opportunity
- You now have a Show ID button visible. Once you click it, it shows the ID of the record


No comments:
Post a Comment